
In this tutorial, you will learn how to make one of those adorable jumping spiders as the cutest decoration for your shelf. Don’t you wish those spiders were bigger in real life? So strange, to hear this coming from someone who does NOT like spiders, usually. This breed is just too cute. With a little work, you can have a giant version of it. Be warned, this is a two-day project as it needs to be prepared in two stages.
Get Printable Measurements Lists when you subscribe to my Newsletter

This post contains affiliate links, which means I make a small commission at no extra cost to you. See my full disclosure here
Why Foam Clay is So AMAZING!
Crafting with foam clay is not just about creating cute figures; it’s like a therapy session that’s all about relaxation and pure enjoyment. Imagine the joy of squishing, molding, and creating without any mess – that’s the beauty of foam clay! It’s not just for the kids; adults can totally get in on the fun too. So, if you’re looking for a creative outlet that’s soothing and brings out your inner artist, foam clay is the way to go!
It’s a fantastic indoor activity for the whole fam! It’s the perfect medium to improve your sculpting skills. If you are looking to quickly learn new skills to master your other mediums such as polymer clay or ceramics you are at the right place! Foam clay is so quick and easy to work with that you can practice many projects in a short amount of time improving your skills along the way. What are you waiting for? let’s get those creative vibes flowing together! 🌈✨
Tips for working with Foam Clay
- If you have a particular soft and sticky clay I suggest to let it dry just a little bit and then mix it well or you can add a different type of clay called SOFT Clay. This will take the tackiness out and give the foam the needed support to hold its shape.
- The Secret to a super smooth and wrinkle-free appearance is your palm and the right pressure. When you roll the clay between your palms don’t be afraid to really squish and roll it around. This will ensure all the wrinkles disappear. Then you lessen the pressure and shape it into its final form.
- if you are trying to save money and color your own clay, use Gel Food Colors. I find that acrylic colors will mess up the clay’s consistency and dry it out, which makes it difficult to work with.
If you are brand new to foam clay watch my beginner playlist on youtube that will go more into detail and teach you everything you need to know about foam clay.
Let’s get started
MATERIALS YOU WILL NEED:
or purchase the complete Kit
WATCH ME MAKE THE SPIDER
STEP 1: Color your clay
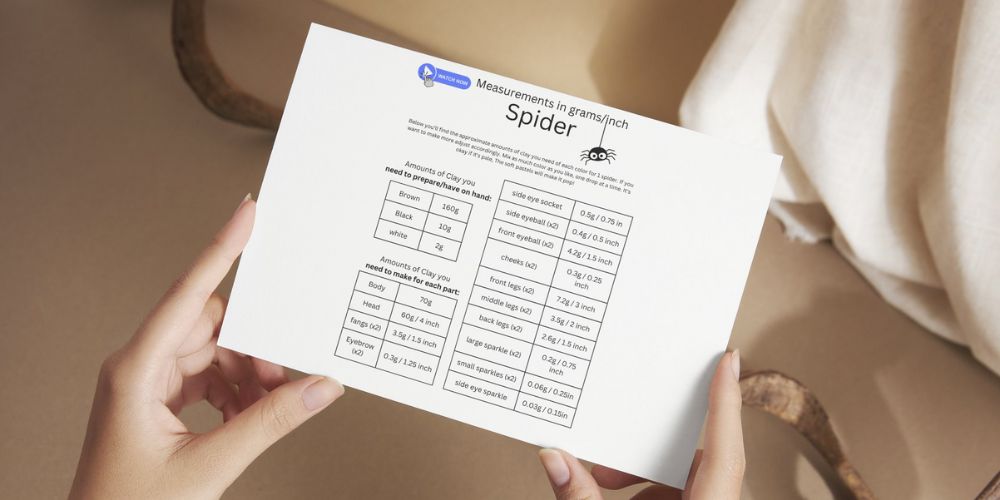
Color at least 200g of clay brown using gel food colors. Do one good squirt and then just a drop at a time until you have a medium brown. Dont worry if it is pale, we will shade with brown pastels which makes the color pop and is long lasting.

STEP 2: Covering the Ball
Roll out 70g of your brown clay. Go really slow when you see bubbles appear to let the air escape without them popping. Roll to about 1/8 of an inch.
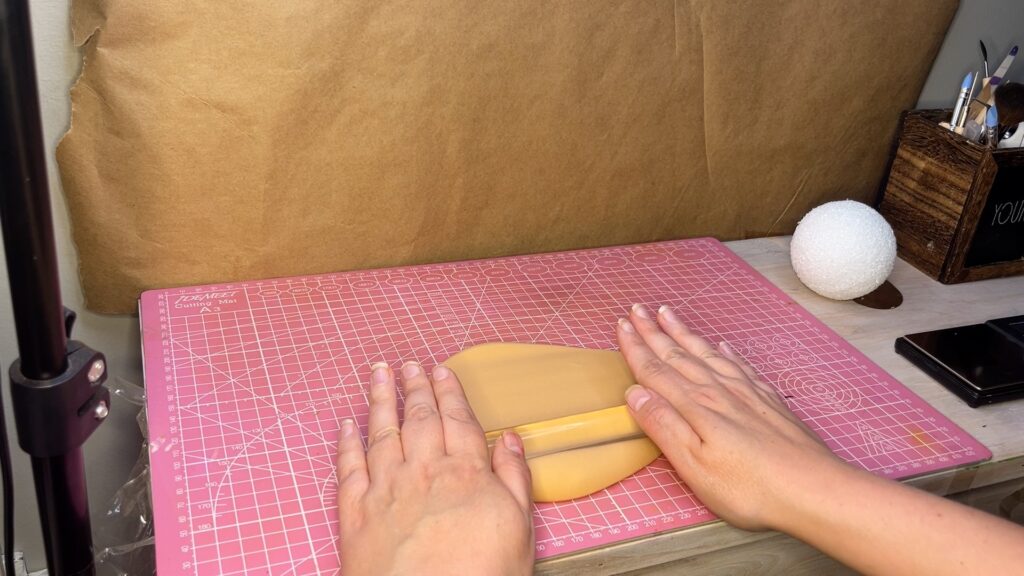
Then drape it over the ball. Cut off any excess at the bottom, then start closing the gap using your palms.
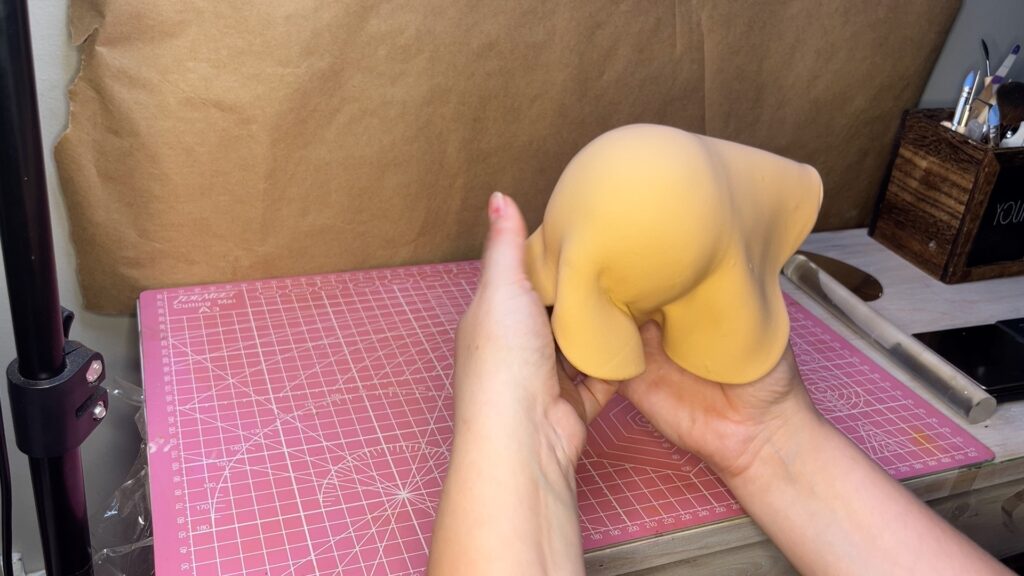
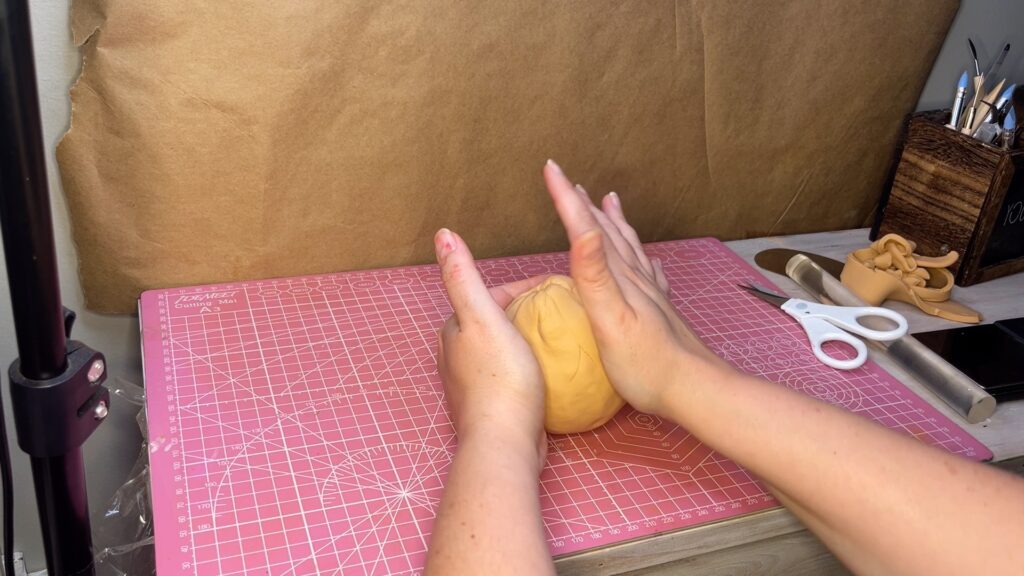
Smooth out the surface by applying pressure with your palms all over the ball. It won’t be perfect, but that’s okay. In the end, the details will distract from imperfections.
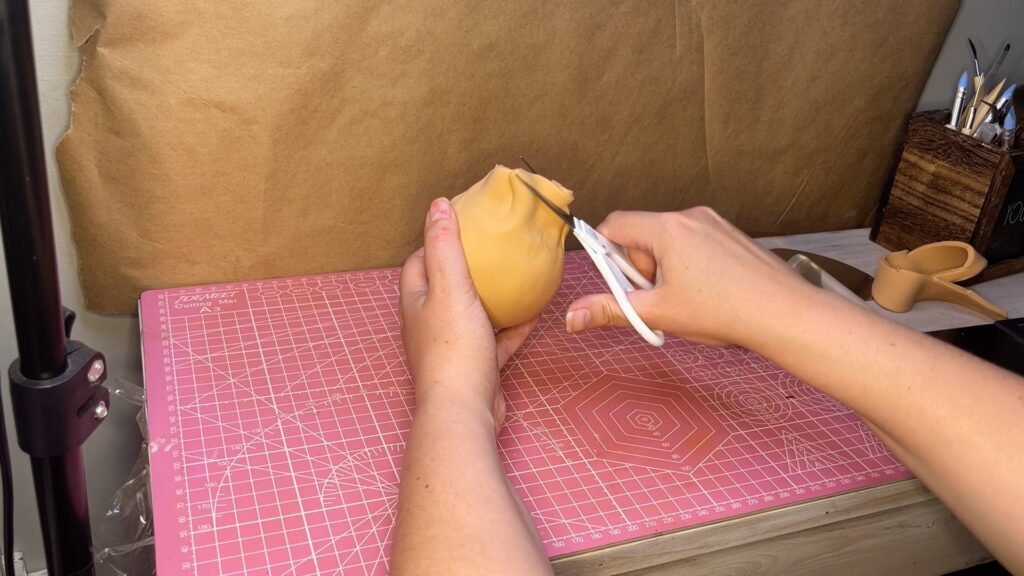
Step 3: Make the Head
Take 60g of brown clay and shape it into a thick oval, somewhat flat at the front and back.
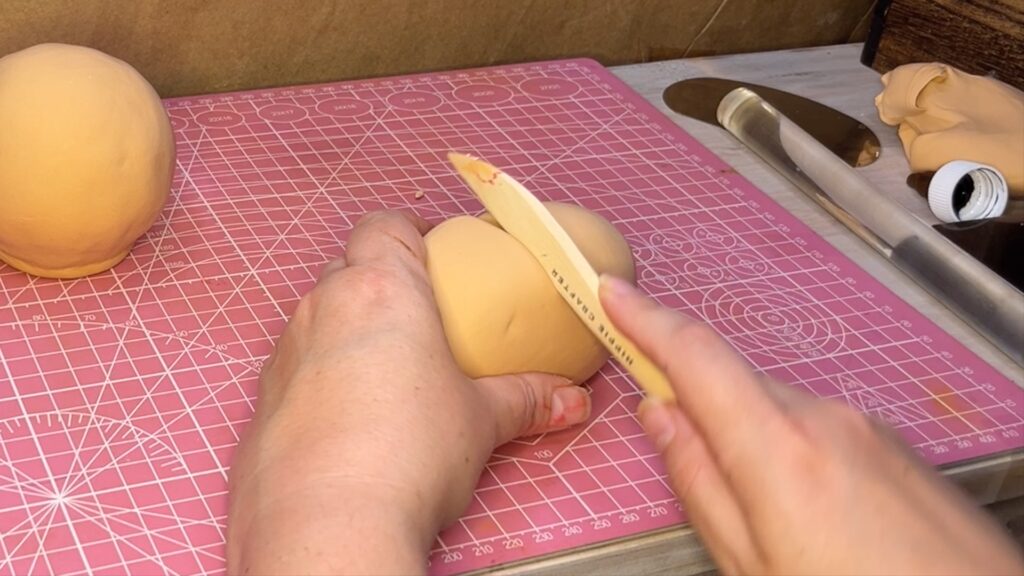
With a tool or paintbrush, make an indentation in the middle to create the head shape of the spider. Smooth it out to blend it in.
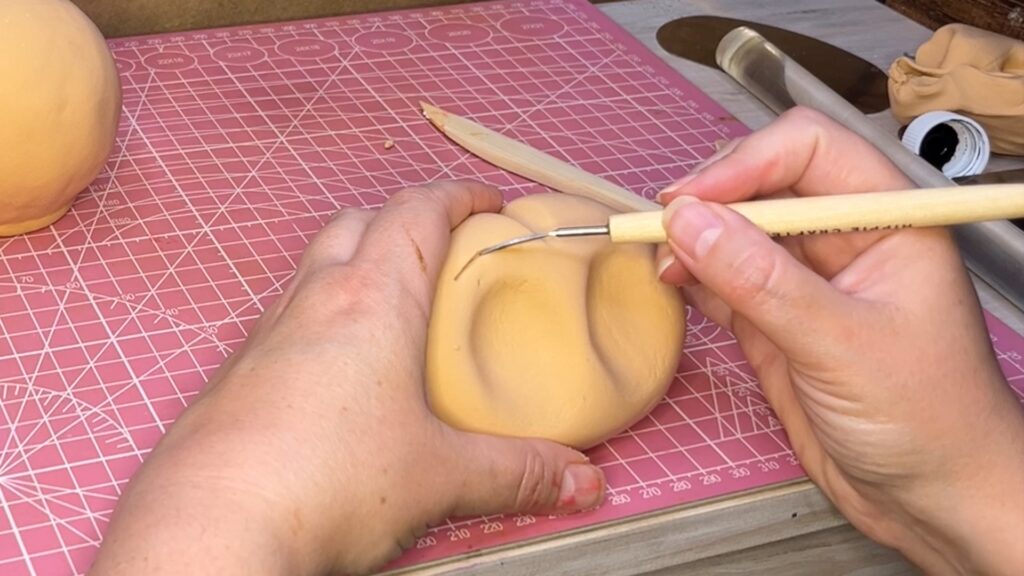
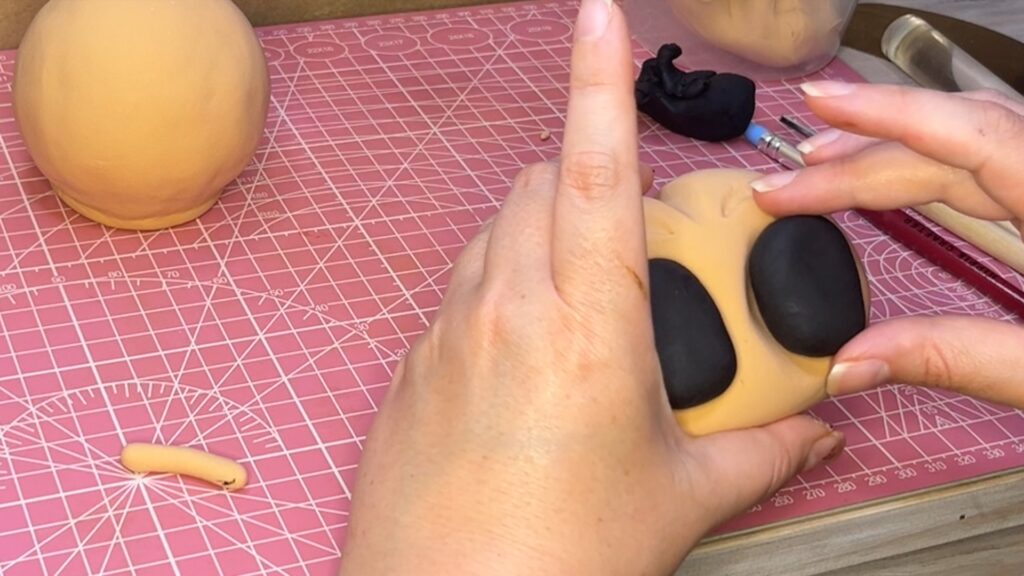
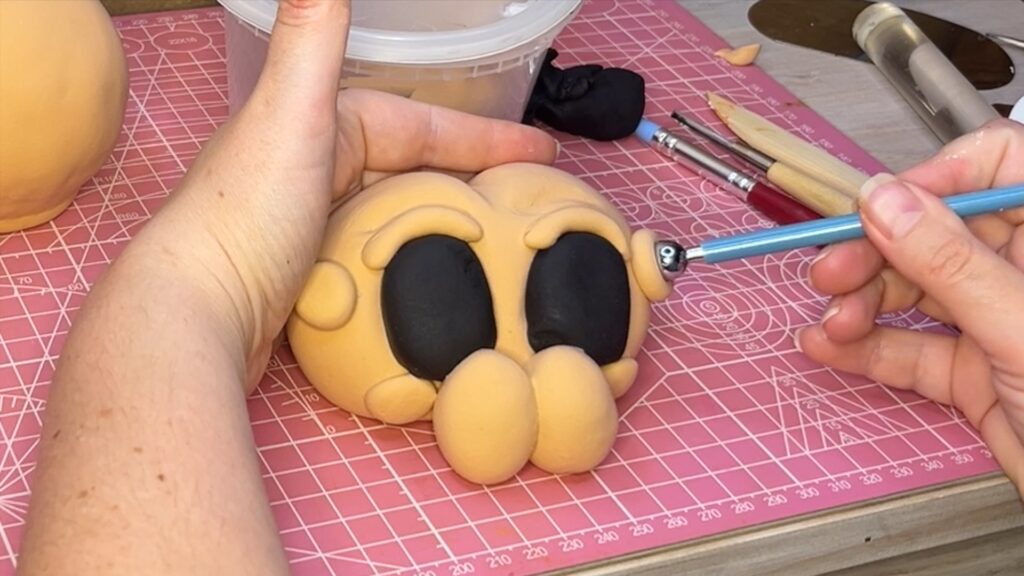
Next, use your hands to make the eye sockets for the large, front eyes.

To sculpt the forehead area, make a cut where you want the brow indentation and then use a silicone tip tool to widen the cut and smooth it out. At the end of this tutorial, I summarize this with more tips for successful sculpting with tools.
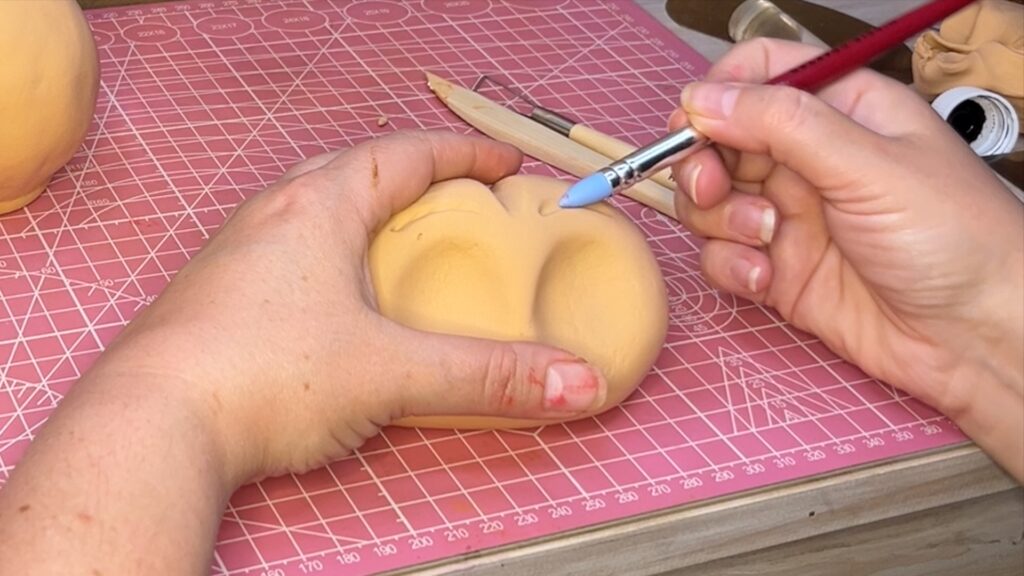
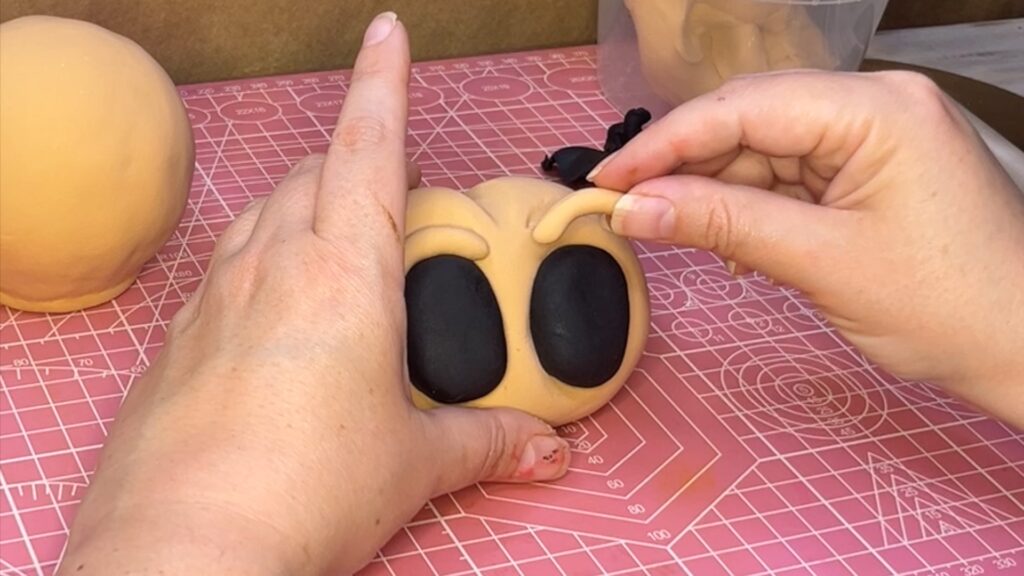
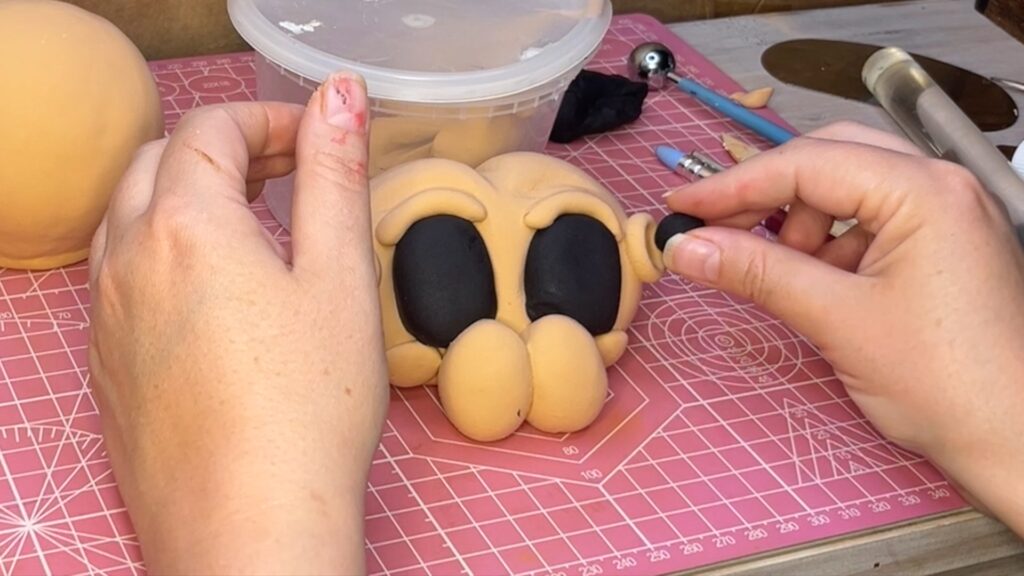
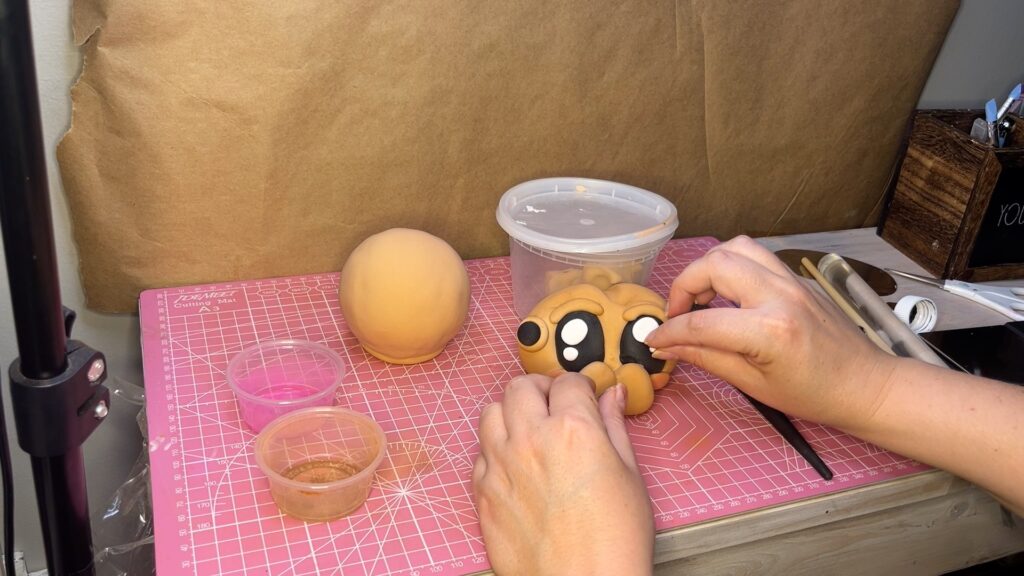
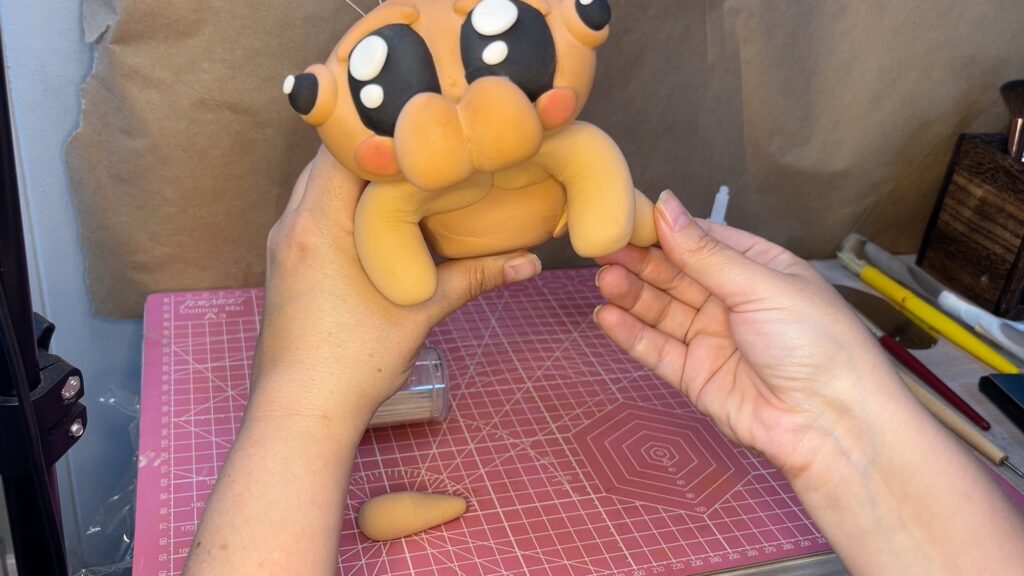
Take 4.2g black clay and shape two oval eyeballs. Insert them into the eye sockets. For the eyebrow, take 0.5g brown clay and shape it into a log. Place it above the eye.
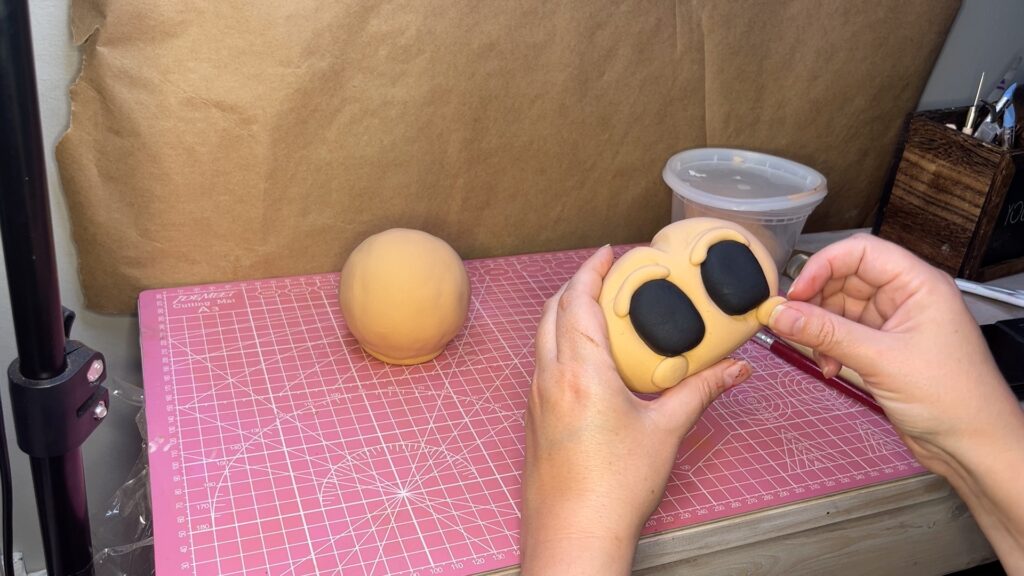
Take 0.3g brown clay and shape two small balls. Press them under the eyes to sculpt the cheeks.
Next, shape the fangs from about 3.5g clay. Shape two ovals and press them together, then place them in the bottom middle part of the face.
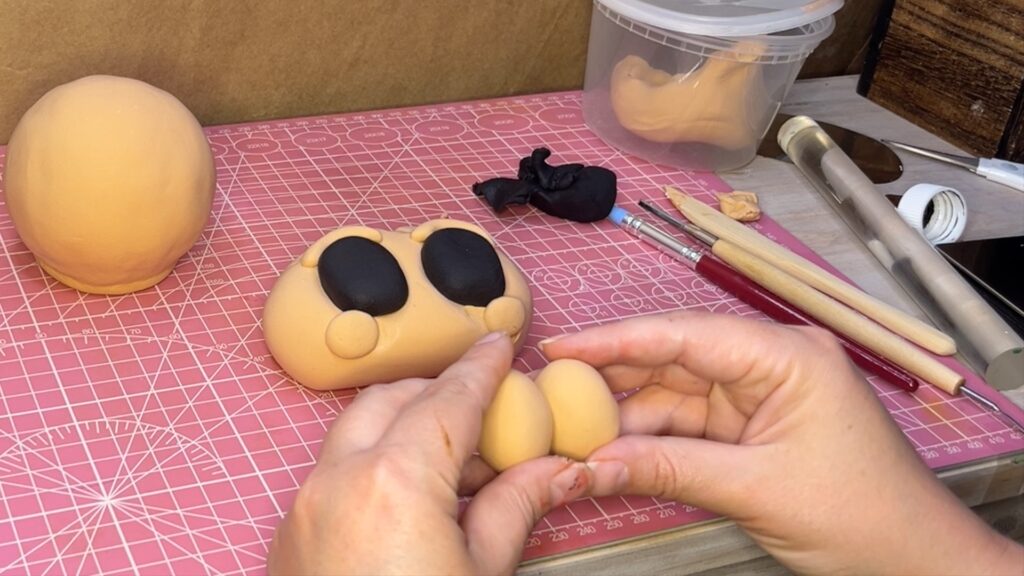

To create the extra side eyes, take 0.5g brown clay and shape it into a ball. Attach it to the side of the head right next to the front eyes, then use a ball tool to make the eye socket. For the side eye balls take 0.4g of black clay and shape it into balls, then attach into the socket.

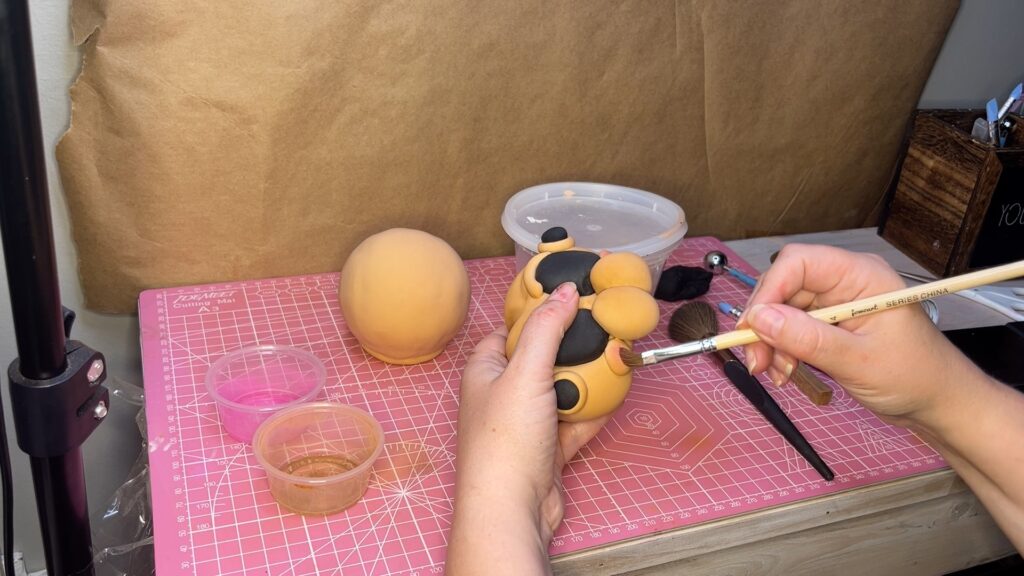
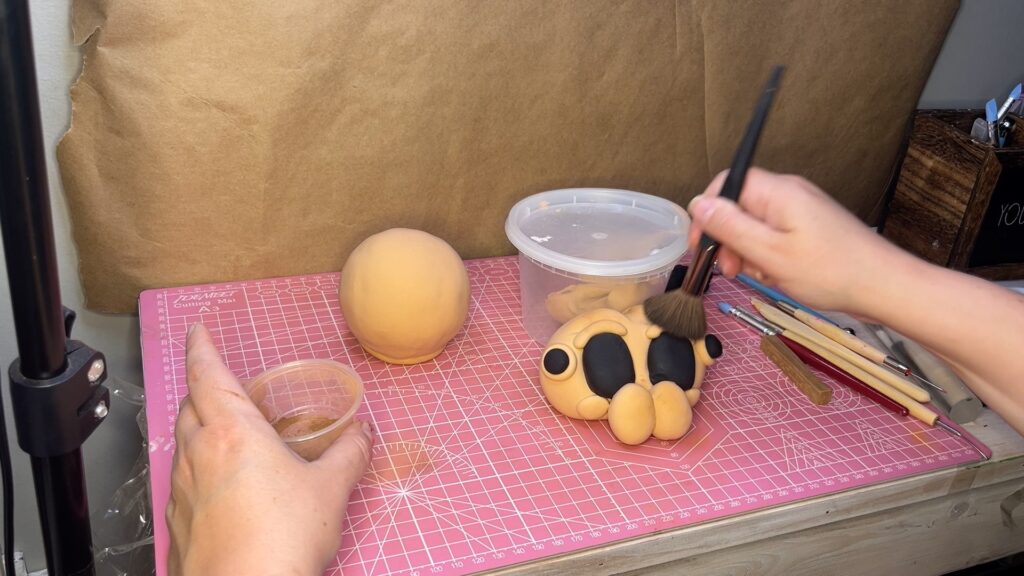
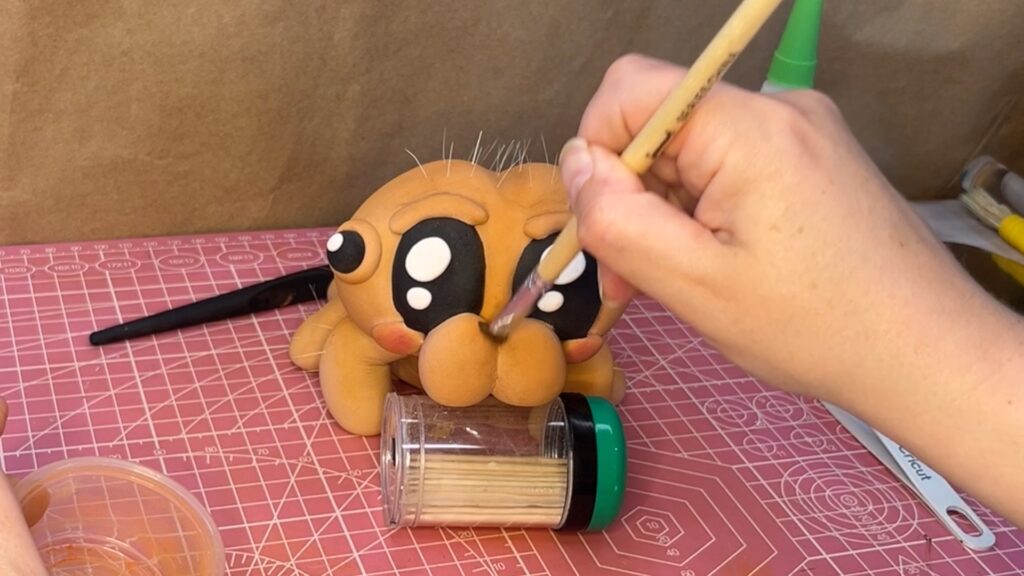
Shade everything with brown pastels to give it a soft and furry look. For extra cuteness, shade the cheeks pink.
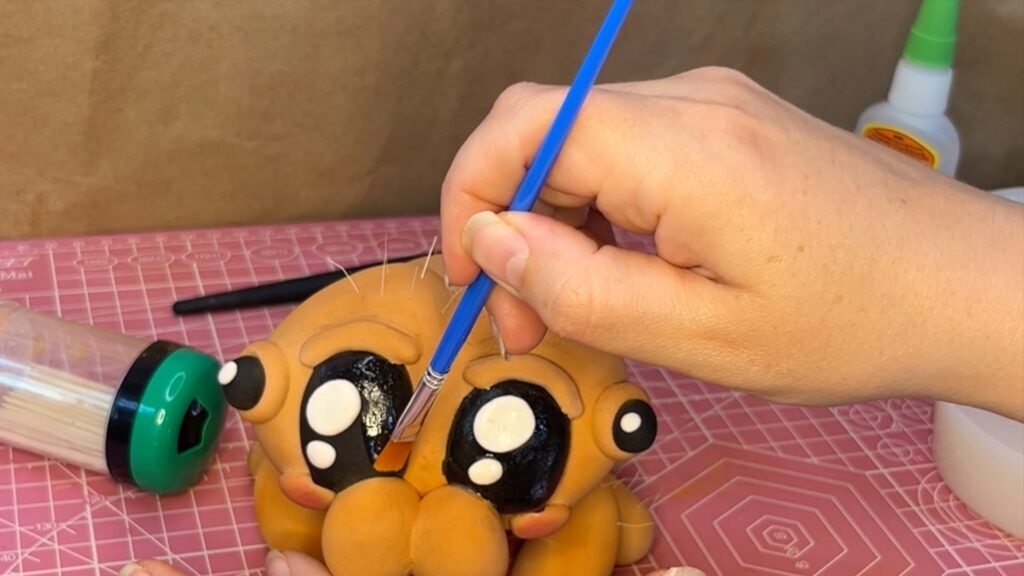
Take about 0.2g of white clay, shape it into a ball and flatten it. These will make up the larger sparkle in the front eyes. Then make two smaller white balls (0.06g) for the smaller sparkle. For the side eye sparkle take about 0.03g of white clay.
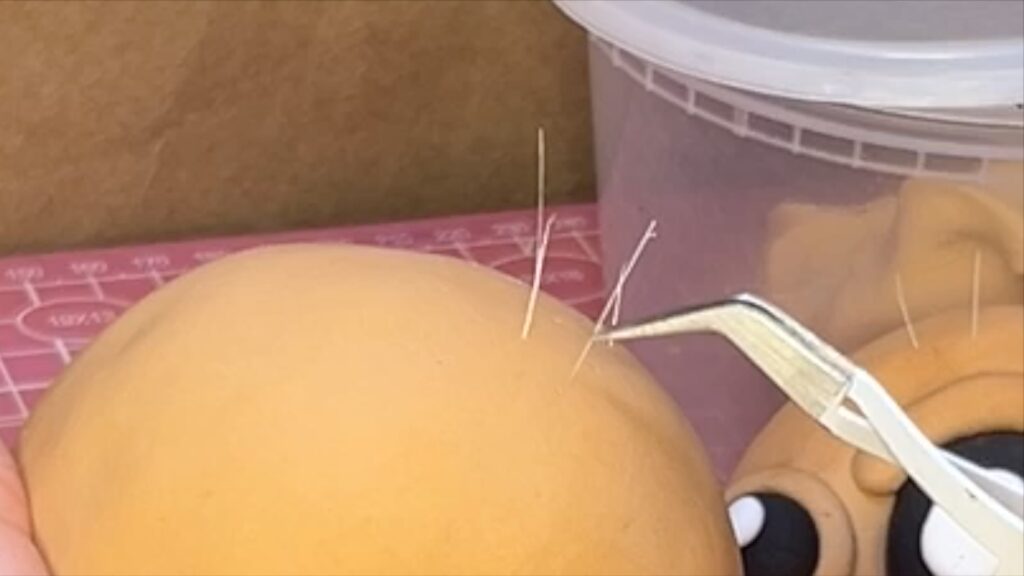
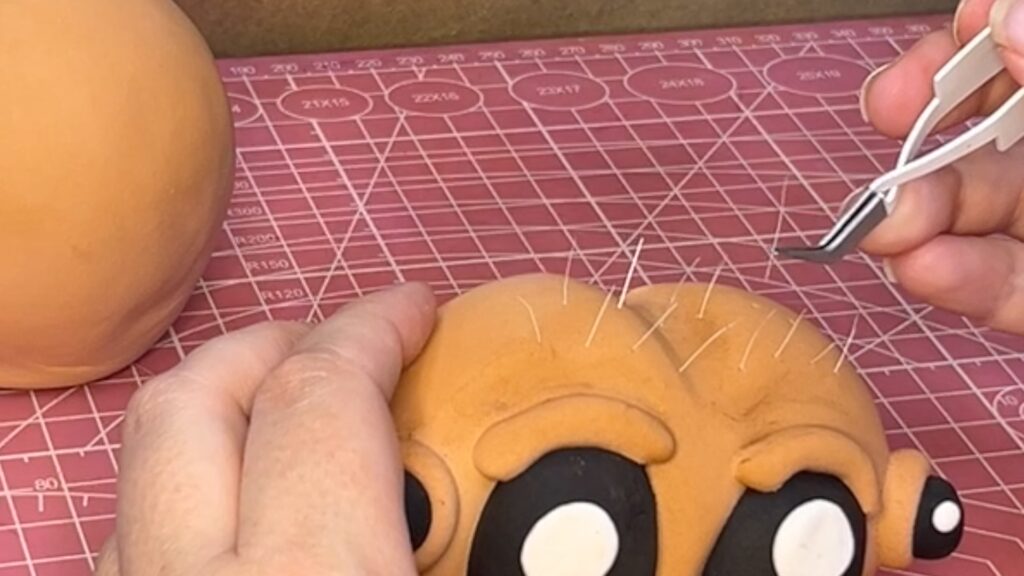
STEP 4: Adding Hair
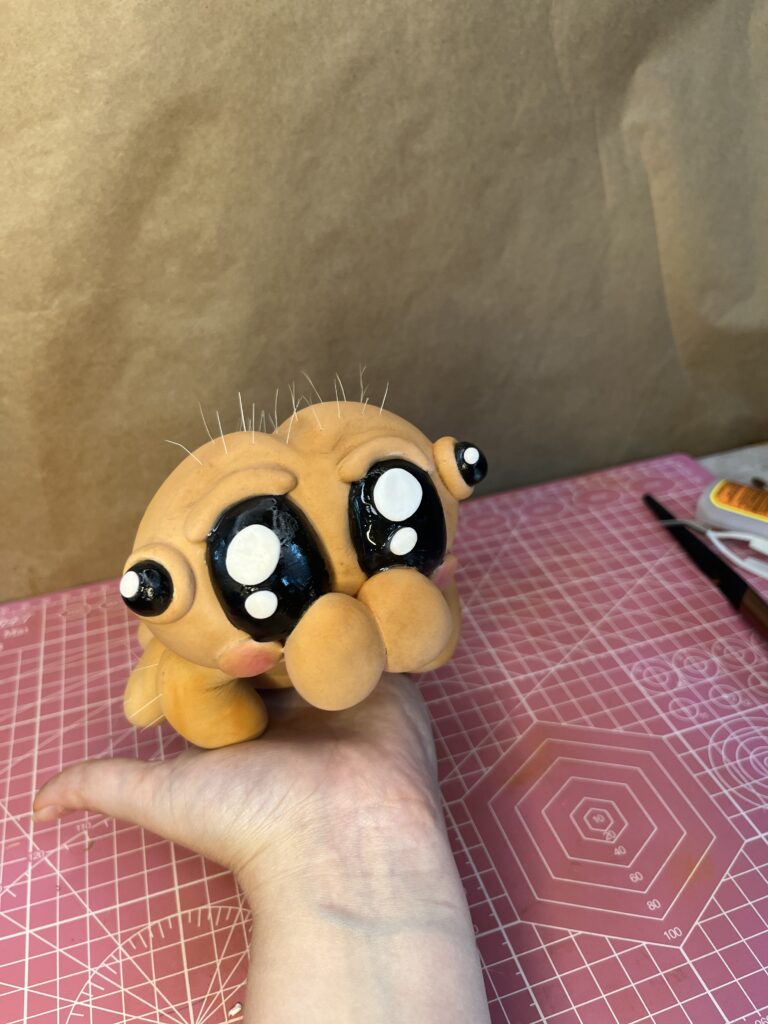
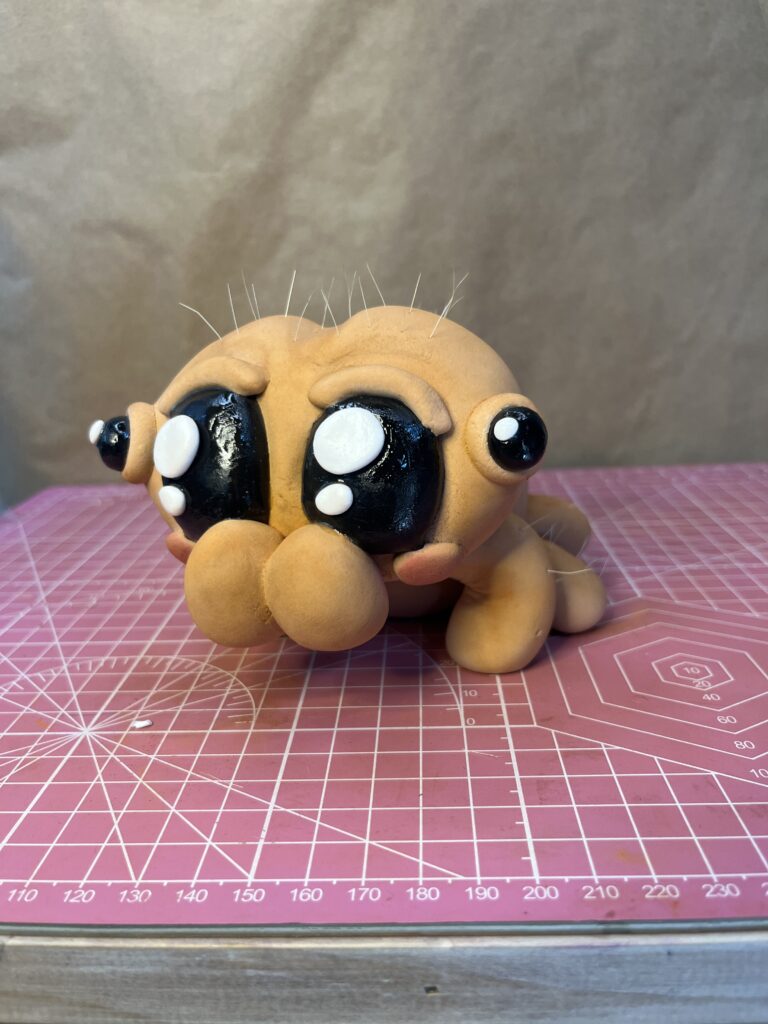
Cut some bristles from an old paintbrush. With a needle, create the hair shaft then insert the bristle. You can place more, of course—the more, the merrier. Add some to the head, the back, and the legs.
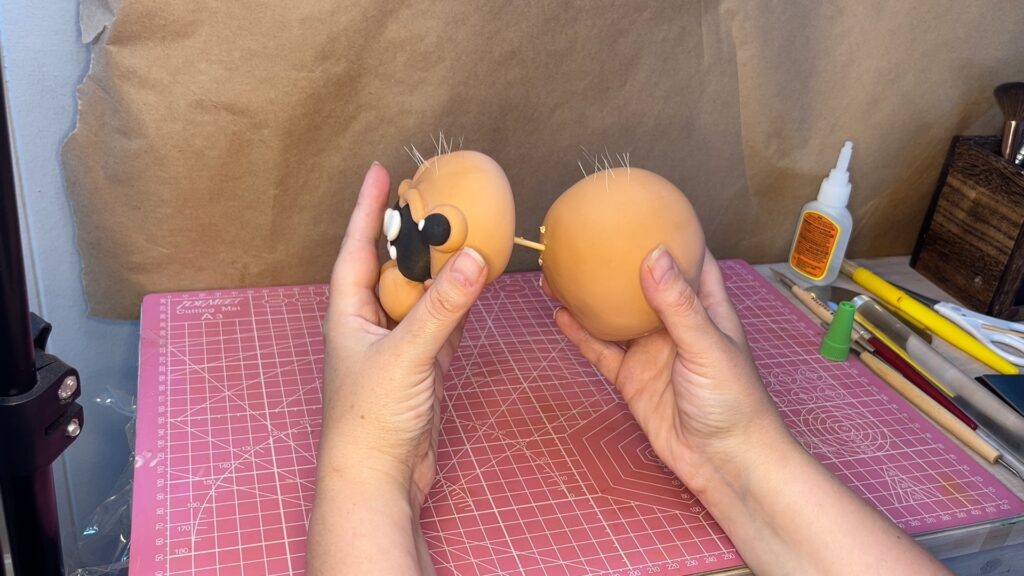
Let your head dry for 24 hours before you attach it. This helps prevent squishing and misshaping anything during the assembly process. Let it dry laying on its back side.
————— 24h drying time ————————-
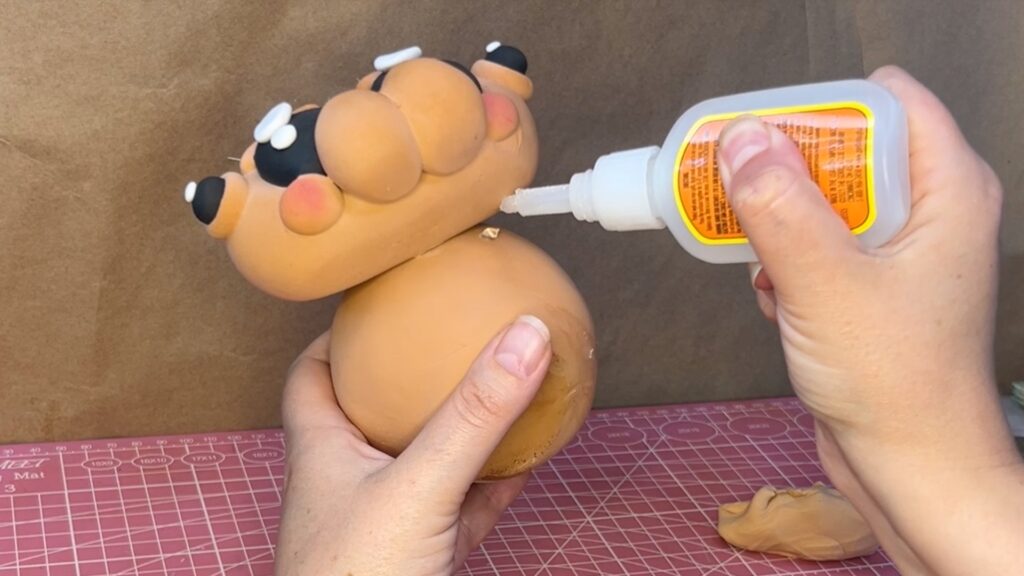
The next day poke a toothpick into the body and slide the head onto it. Use a bit of glue to help secure it.
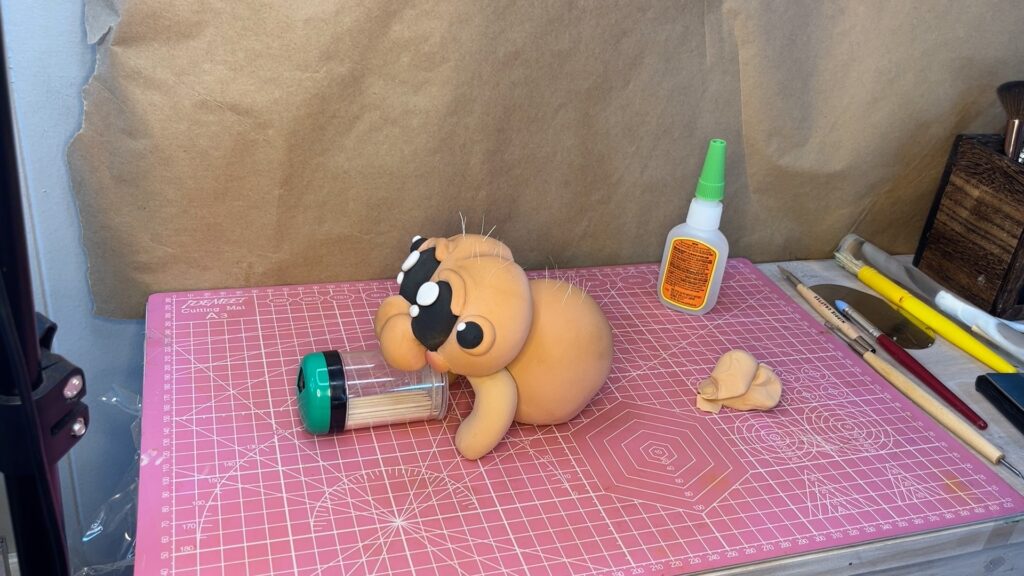
STEP 5: The Legs
Take 7.2g brown clay and shape a 3 inch log for the front legs (2). Since everything is has dried, you definitely need to apply glue. I use Gorilla Glue most of the time. You can also use Mod Podge. Press the leg onto the underside of the spider, then bend it.
Make sure to have something to place the head on to keep pressure off the fresh legs. You want them to dry first before you put any weight on them, so they won’t lose their shape.

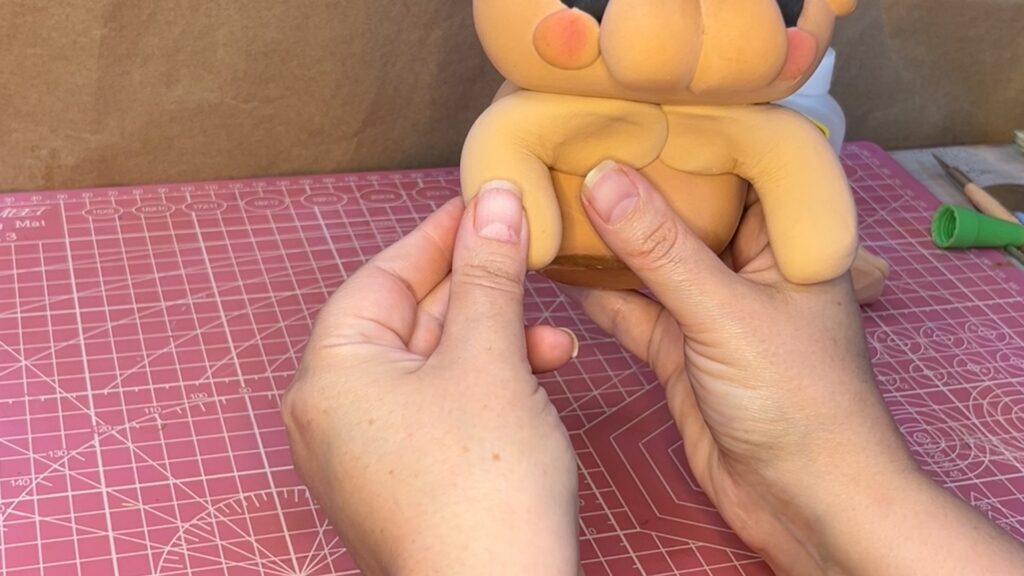
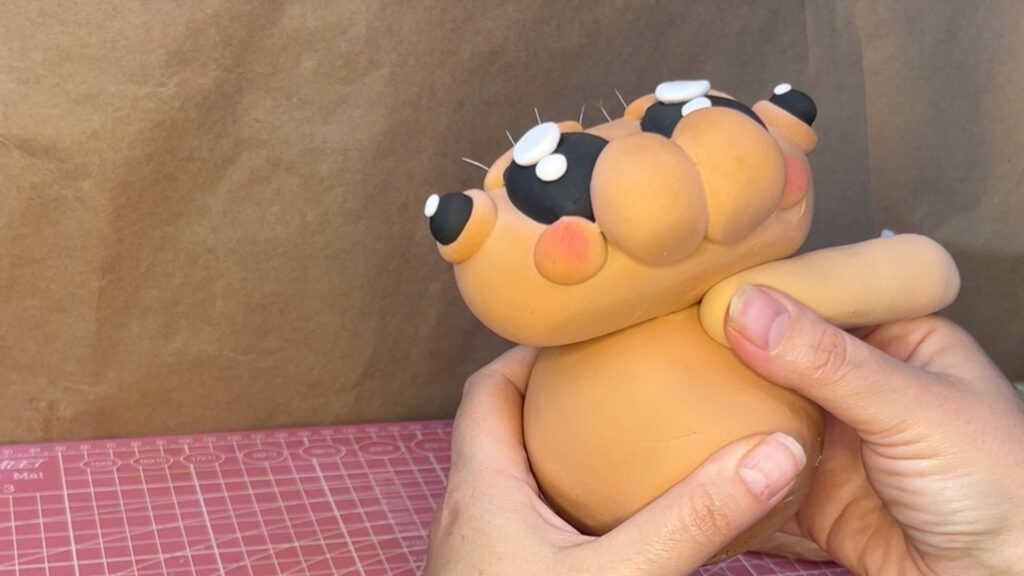
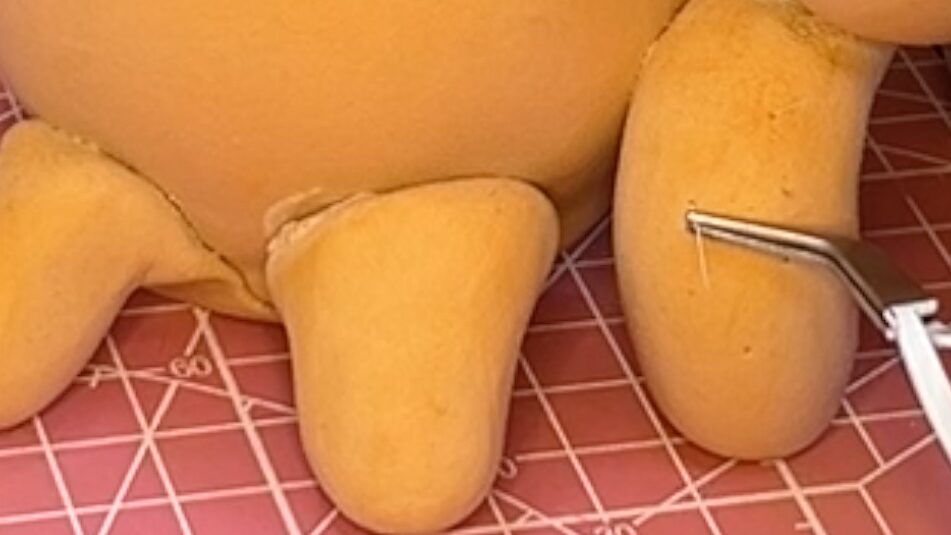
For the second set of legs, use a little less clay, about 3.5g. Shape them into teardrops, about 2 inches, and attach them the same way as the front legs.
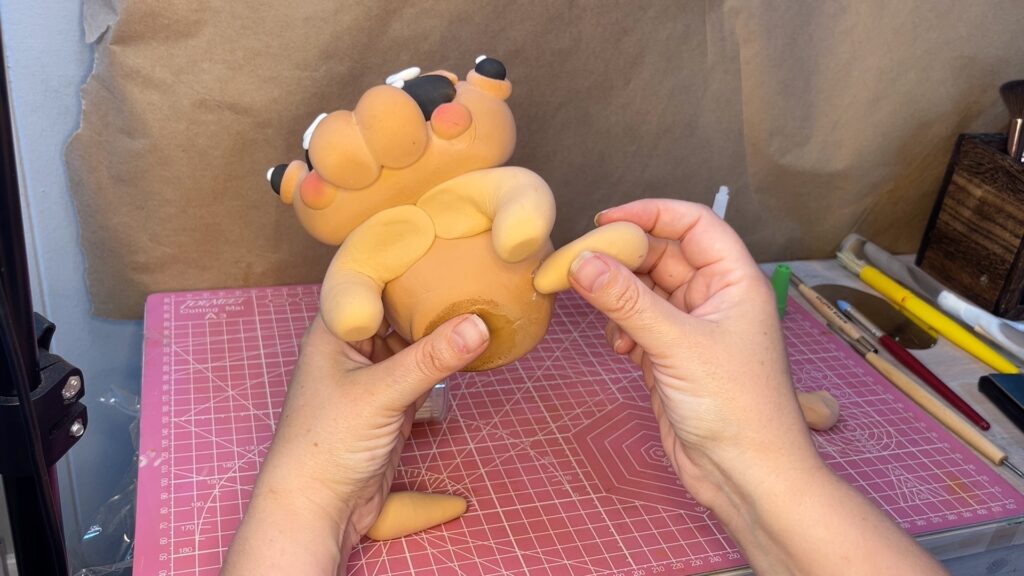
For the third set of legs, use an even smaller amount, about 2.6 g. Attach them just like the other legs. Make sure to close the gap between body and leg. Check the tips at the end for some things I learned from this design.
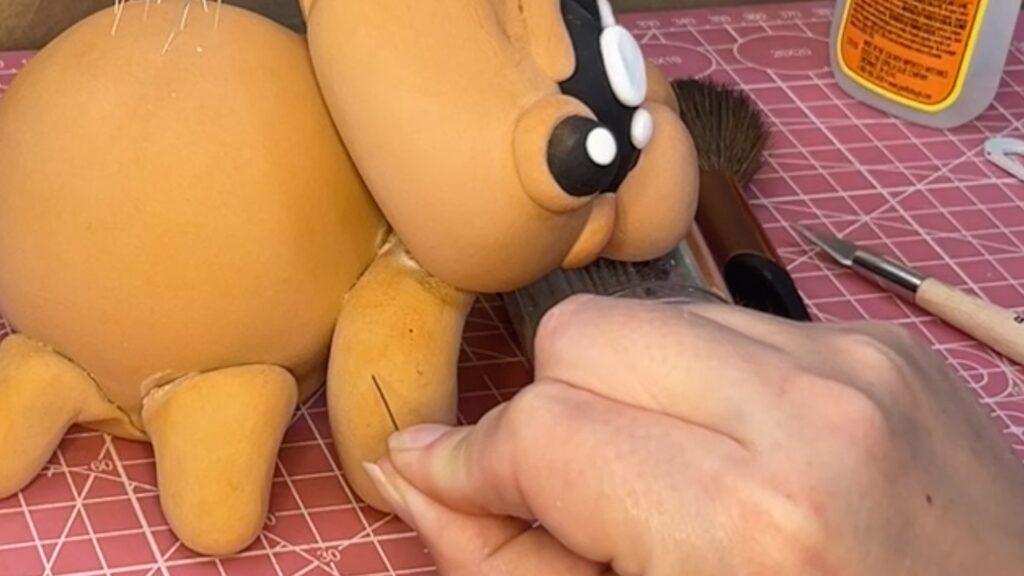
Now is the time to add that leg hair and apply some more brown pastels. Use a small brush to apply some more brown pastels especially in the crevices.
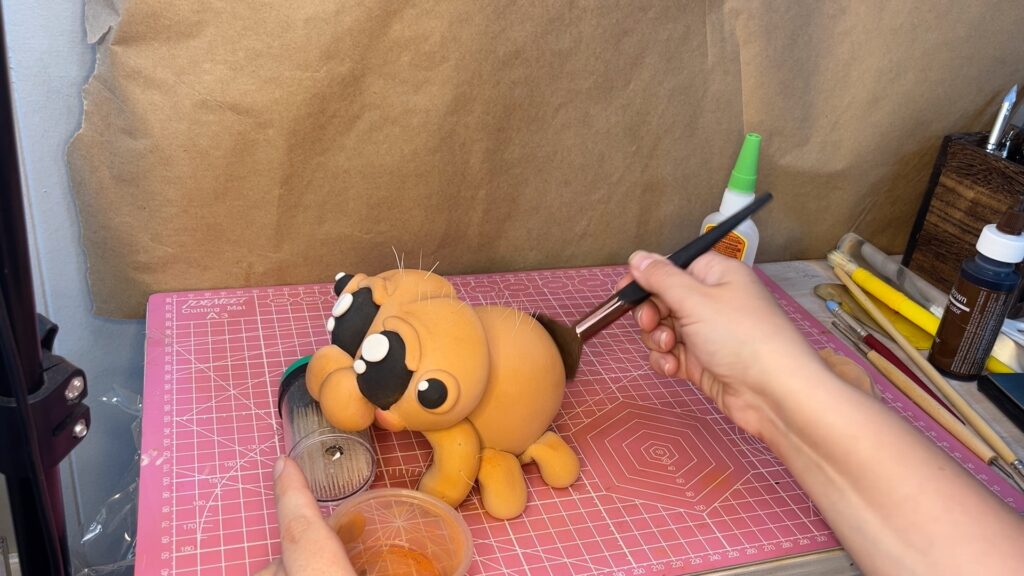
STEP 6: Final Touches
For the last step, I used Maker’s Magic to make the eyes shiny. You can also use resin.
Again, let it dry propped up so the legs can harden and it won’t tip over under its own weight.
This will take a few days to completly dry.
Let me know below if you have any questions or want to share how your spider turned out. If you know someone who loves to craft please, share this tutorial with them. I really appreciate it!

3 Valuable Tips I learned while making the Spider
Here’s what I learned this week while making the jumping spider. If you’re new here, I design on the fly and learn as I go. So, no I am not a professional foam clay artist, I am still learning too! Anything I find helpful, I will share with you in my weekly Foam Clay Tips. You can always ask me specific questions—I would love to hear what you struggle with.
1. Tool Struggles

Using tools with foam clay is definitely different from other clays. Other clays don’t dry as quickly as foam clay. Foam clay forms an almost instant skin that, when moved or manipulated too much, develops stretch marks. If you slide a tool over the surface, you risk pulling the clay’s surface and form wrinkles. Since I’m still new to using tools with this clay, I’ll be trying other things like water or maybe even oil. This time, I tried cutting the surface and then smoothing it out, which worked well for me. you can see this in the full tutorial when I shape the forehead.
2. Ugly Gaps
Often, I use glue to connect two pieces. I noticed that the glue I use, Gorilla Gel, makes the foam clay lighter and almost looks like it bleaches the area it touches. If the gap is closed and no extra glue seeps out, it’s not a problem. However, it becomes an issue when you use too much glue, and it seeps out, leaving visible marks. It’s also a problem if the gap opens up because it was lacking a little support during drying time. So use it sparingly you really dont need much. I will be testing other glues that might be less visible because I tend to overuse it since I worry that parts might fall off.
3. Losing its form
There is nothing worse than finishing a project, leaving it to dry, and coming back to find it lopsided. There’s usually nothing you can do to fix that. That’s why it’s so important to have proper support in place. It can be tricky to know exactly where and when a sculpture needs support, and sometimes it leaves dents and unwanted flatness. When in doubt, create in stages! For example, if you have a large head, create the body and head separately and assemble them when they are dry. This will help you avoid lopsiding, shifting, unwanted flatness, and collapsing under its own weight. I know it’s hard to resist seeing the finished project right away, but you will be so happy with the end result.
Looking for more foam clay tutorials? Visit the Learning Hub to explore beginner to advanced projects and techniques.
Please share!!! it always helps me find my crafty people 🙂
Thank you!!!